How to Add Bridges to a Stencil in Inkscape
Keep the centers of letters and enclosed shapes attached. Add stencil bridges in Inkscape, inspect the paths and check the design before cutting.

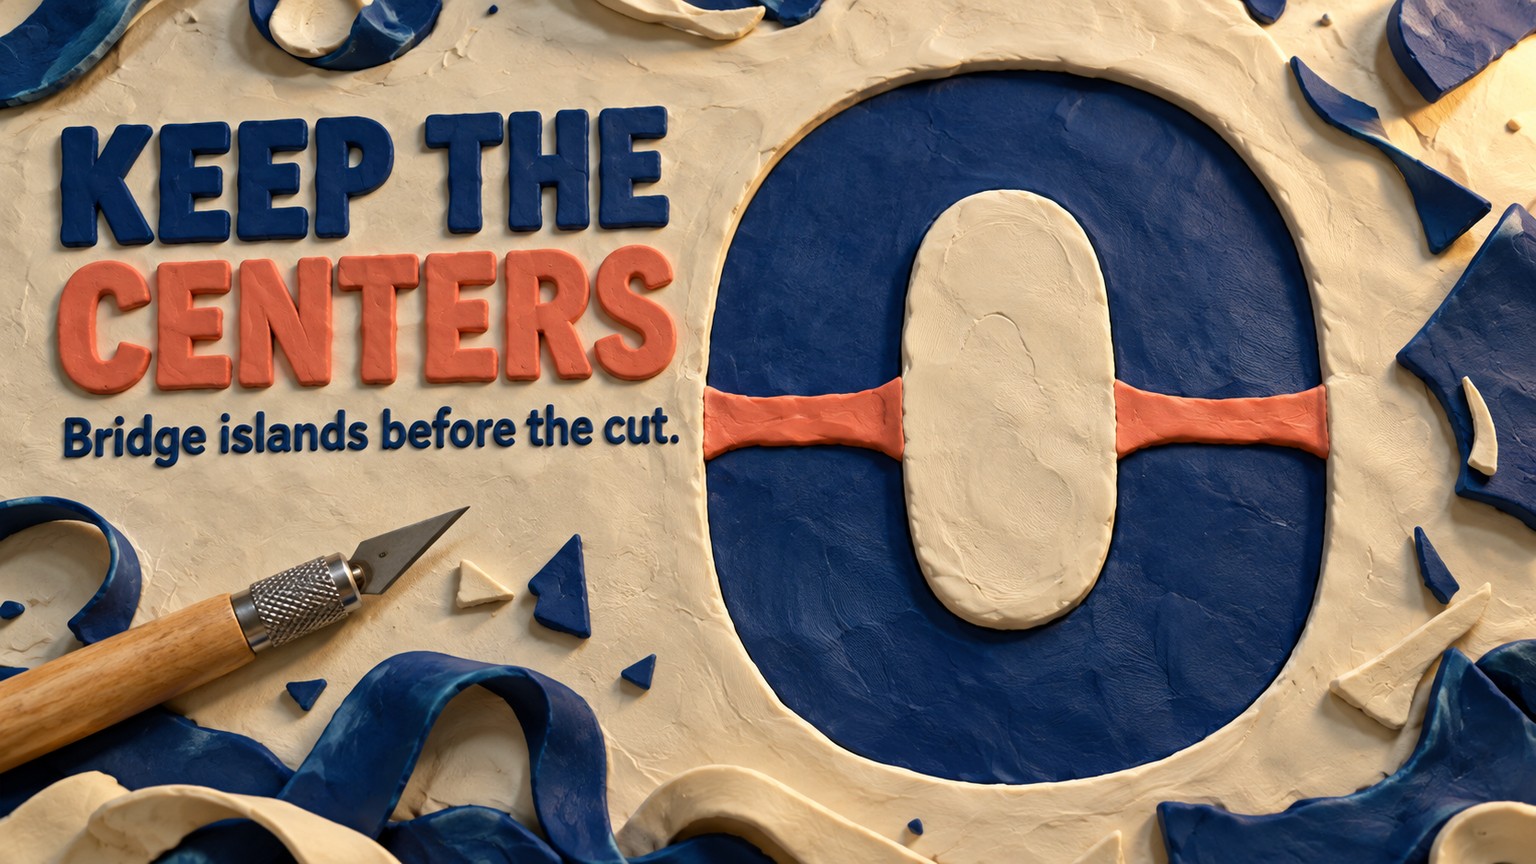
Add a narrow gap to each cutout path so every enclosed center stays physically tied to the stencil sheet. Inkscape costs nothing, while a custom graphic stencil can start at $39, so the cheapest place to catch a floating island is in the SVG, before material and cutting enter the bill.
The short answer
Draw a rectangle across the cutout where you want the bridge, keep that rectangle above the stencil path, select both objects, then choose Path > Difference. Difference subtracts the top object from the bottom one, so the rectangle removes a small section of the cutout and leaves a strip of stencil material behind.
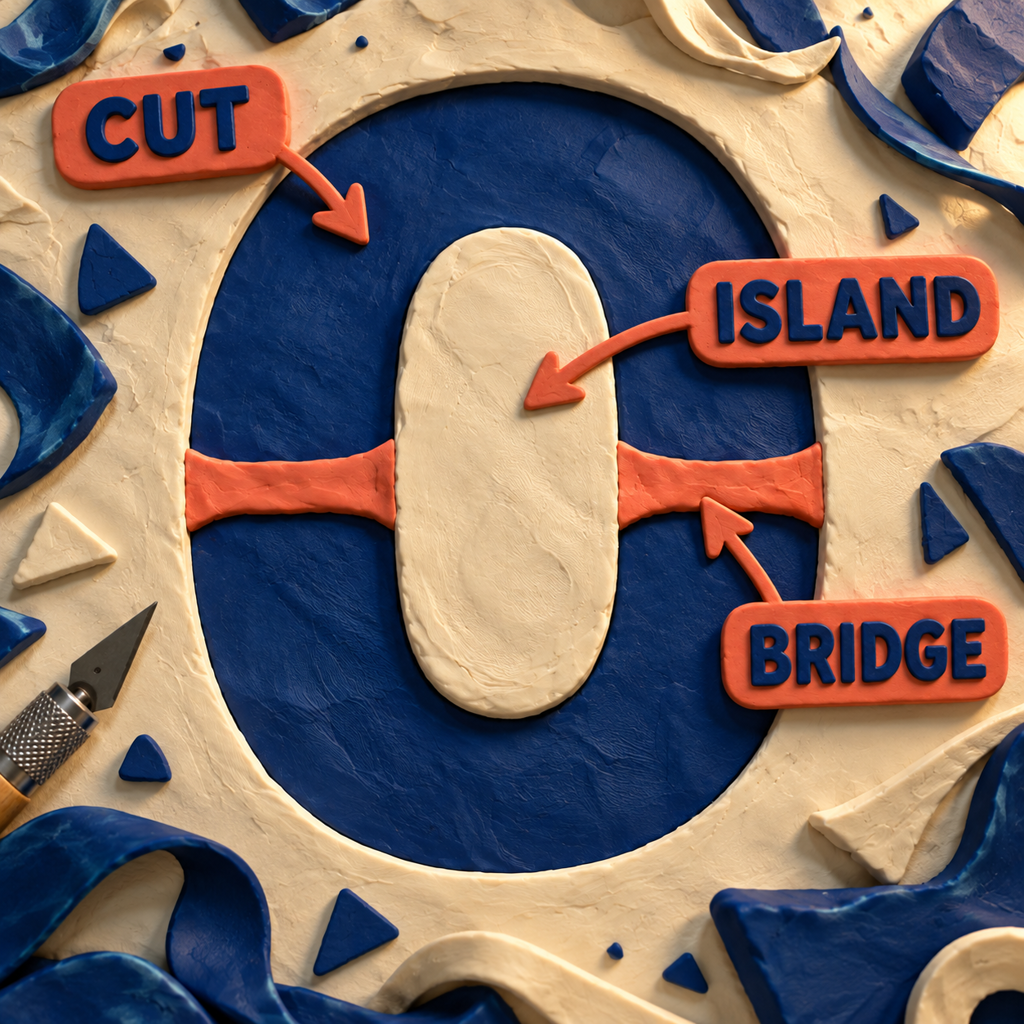
That strip is the bridge. It connects an enclosed center, called an island, to the main sheet. Think of the cutout as a moat and the bridge as the strip of ground you refuse to excavate.
What needs a bridge
Any piece of stencil material fully surrounded by a cut needs a route back to the outer sheet. The centers of A, B, D, O, P, Q and R are common examples. Eyes, wheels, rings and enclosed logo details create the same problem.
Without a connection, the cutter releases that center as a loose piece. Paint then reaches an area that was meant to stay masked. A stencil can look perfect on screen and still fail the moment it leaves the cutter.
Use one visual convention before editing. In this walkthrough, the dark filled shape is the aperture that will be removed, and the light area is material that stays. If your file uses the reverse convention, reverse the logic before applying Difference.
Prepare the artwork first
Start from a duplicate of the SVG. Keep the untouched original nearby because Boolean operations change the paths.
If the design contains live text, convert it with Path > Object to Path. Inkscape treats converted letters as editable paths, which lets Difference alter their outlines. Ungroup grouped artwork until you can select the actual cutout path.
If your starting image is a PNG, JPEG, photograph or AI-made graphic, import it and use Path > Trace Bitmap. Inkscape describes tracing as a way to turn a raster image into editable paths, and its single-scan modes work best on clear silhouettes. The trace is an interpretation, not a guaranteed perfect copy, so simplify noise and inspect small gaps before adding bridges.
An SVG is only the container. It does not prove that the design is connected, manufacturable or reusable.
Add the bridges with Path Difference
1. Find every island
Scan the design as material, not as an illustration. Start at each enclosed light region and ask whether you can reach the outer sheet without crossing a cut line. If you cannot, that region is an island.
2. Draw the bridge rectangle
Use the Rectangle tool to draw a narrow bar across the cutout. It should overlap the island on one side and the connected sheet on the other. You are marking the part of the aperture that should no longer be removed.
Choose the width for the real material, finished size and cutting process. There is no honest universal width. A bridge that survives in rigid sheet at poster scale may fold or disappear in thin film at label scale.
3. Put the rectangle on top
Stacking order controls the result. The stencil cutout path belongs underneath, and the bridge rectangle belongs above it. If needed, raise the rectangle before selecting both objects.
4. Apply Difference
Select the cutout path and the rectangle, then choose Path > Difference. The rectangle disappears and the cutout gains a clean interruption. Inkscape can convert the rectangle as part of the Boolean operation, so a separate Object to Path step is not required for a normal rectangle.
If nothing changes, read the status bar. The usual causes are the wrong stacking order, a group instead of a path, or two objects that do not actually overlap.
5. Repeat, then consolidate the work
Every island needs at least one continuous connection. Large or flexible regions may need more than one bridge for stability, and weaker material may need more support than a sturdy sheet.
For repeated bridge widths, duplicate a rectangle before applying Difference. If several rectangles affect the same cutout path, you can select the rectangles, use Path > Union, then subtract that united bridge shape from the cutout in one Difference operation. Keep a backup because Difference consumes the bridge object.

The Eraser method is faster, but less repeatable
Inkscape's Eraser can also open a cutout. Select the Eraser, choose its mode for cutting from paths and shapes, set the width, then drag across the vector shape where the bridge should appear. This is useful for organic artwork or a quick repair.
The rectangle method is the better default for production files. It gives you a visible bridge width, straight edges, easy duplication and a predictable Boolean result. The Eraser is a drawing gesture; Difference is a small piece of geometry you can inspect before committing it.
Run a connected-material check
Do not stop when the image looks right. Test the structure in four passes:
- Border test: Starting at the outer sheet, mentally flood the material. Every kept region should be reachable without crossing a cut.
- Counter test: Inspect every enclosed letter center, eye, wheel, ring and nested logo shape.
- Scale test: View the art at its final physical size. Thin bridges and tiny gaps can look generous while zoomed in.
- Proof test: Cut one representative problem area at final size, in the intended material, with the intended machine settings. Bend, lift and paint through that proof before committing the full sheet.
This is the same connected-piece logic that separates an attractive picture from a usable scroll saw portrait pattern. A related stained-glass pattern check asks a similar question: will the physical pieces behave the way the drawing suggests?
The business math
Inkscape is free and open source. A custom graphic stencil starts at $39 at Stencils Online, while Stencil Monkey lists a $42.90 custom stencil that includes design preparation and a proof. Those vendor prices include more than file repair, and often include the physical product, so a DIY SVG is not a free substitute for material or cutting.
The saving is earlier and more specific: you move the geometry correction into a $0 design tool, submit a cleaner file and reserve paid production for the part you cannot do on screen. That matters most when you sell variations of the same logo or name. It matters less when a specialist's proofing, material choice and cutting service are exactly what you need.
Manual repair also has a ceiling. An archived Inkscape discussion calls out the tedium of graphics needing more than 50 bridges. At that point, the next useful product is not another tutorial. It is a preflight tool.
Six workflows where bridge repair pays
What you could build around this
1. A connected-stencil preflight tool, the strongest opportunity
The product would accept an SVG, flag every disconnected island, suggest bridge positions and let a user approve or move each bridge before export. The phrase stencil maker receives about 12,100 monthly searches, while stencil maker free receives 2,400 and its yearly trend is up 81%. That is a visible audience already asking for a tool, not just a tutorial.
The smallest sellable version needs an SVG importer, a connectivity graph, adjustable bridge width, a before-and-after preview and a clean SVG export. A browser app or Inkscape extension could ship the same core engine.
The catch is structural judgment. A geometry engine can prove that regions connect, but it cannot infer every material's stiffness, cutter kerf or paint method. The product needs material presets, a prominent proof-cut step and manual override. This is still the best opportunity because it solves the repetitive part while leaving the consequential choice visible.
2. A proofing portal for custom stencil shops
This would turn a customer upload into an annotated proof that highlights islands, proposed bridges and areas below the shop's production rules. Custom stencils receives about 6,600 monthly searches with a $3.07 cost per click, and custom graphic stencils start at $39. The commercial intent is already attached to the job.
The MVP is an upload page, raster tracing for simple silhouettes, island detection, bridge controls, an approval screen and a quote handoff. A shop pays for fewer email loops and a reusable record of what the customer approved.
The catch is liability. Automatic repair can change a logo's appearance, and different machines or materials need different tolerances. The portal should recommend and explain, never silently rewrite the production file.
Where this method stops
Path Difference fixes disconnected geometry. It does not choose a safe bridge width, compensate for cutter kerf, simplify a noisy trace, preserve a brand mark automatically or guarantee that thin material will survive repeated use.
Do not add bridges blindly to every vector. A one-use adhesive mask, a design assembled from separate pieces or a production process with transfer material may not require one connected sheet. This workflow is for a reusable stencil whose retained material must lift, place and paint as one piece.
For dense artwork, redesign can beat repair. A stencil typeface, fewer enclosed details or a cleaner silhouette may preserve the idea with fewer interruptions than dozens of narrow bridges.
Questions people ask
How do I add bridges to a stencil in Inkscape?
Draw a rectangle across the cutout between an island and the connected sheet. Keep the rectangle on top, select it with the cutout path, then choose Path > Difference. The removed section of cutout becomes material that holds the island.
How do I add bridges to lettering in a stencil image?
Convert the text to paths, then inspect letters with enclosed counters such as A, B, D, O, P, Q and R. Subtract a bridge rectangle from each enclosed cutout and check that every center connects to the surrounding sheet.
How do I make a stencil from a picture?
Import the picture, use Path > Trace Bitmap to create editable paths, remove noisy detail, choose which shapes are cutouts, then bridge every enclosed island. A high-contrast silhouette usually produces a cleaner starting trace than a detailed photograph.
How do I make a spray paint stencil?
Prepare one connected sheet of masking material, add bridges wherever a cut would release an island, and proof a detailed section at final size. The SVG controls the geometry, but the material, paint and cutting process still determine the bridge width that works.
On Monday, take the most reused logo in your production queue, run the border test, repair one representative island and proof that section at final size. If you want a connected-file checker or customer proofing workflow built for your business, see the available services.
- Last Updated
- Sep 16, 2026
- Category
- Design
Prefer this site in Google


Mark omidsaffari.com as preferred and Google lifts it in Top Stories, AI Overviews and AI Mode for you.
MakeBead Export Cost
MakeBead says PNG and PDF exports are free. Check the watermark, account requirements and file limits before preparing a pattern to print.Sep 16, 2026Design
Best AI Tools for Scroll Saw Portrait Patterns
Compare AI portrait drafts and pattern converters by facial detail, connected pieces, editable files and full-size print output.Sep 16, 2026Design
PreQuilt Review for Fabric Color Planning
A PreQuilt review for choosing fabric colors and scaled prints before cutting, with a clear look at the demo, paid features and yardage planning.Sep 16, 2026Design
Best AI Tools for Handloom Weaving Drafts
Compare tools for handloom weaving drafts, threading and tie-ups. See which outputs reach a loom and where AI only supplies visual inspiration.Sep 16, 2026Design
Texloom Studio Review for Seamless Textile Prints
A Texloom Studio review focused on seamless repeats, color control and print exports, with clear limits on what was tested and what needs checking.Sep 16, 2026Design
Best AI Tools for String Art Patterns
Compare string art pattern tools by nail sequences, printable templates, photo controls and usable exports. See where AI claims help and where they stop.Sep 15, 2026Design
Chart Minder vs Stitchmastery
Compare Chart Minder and Stitchmastery for knitting chart design, written instructions, exports, and the point where paid software earns its cost.Sep 15, 2026Design