How to Add Seam Allowance in Valentina
Add seam allowance in Valentina, adjust individual edges and fold lines, then check notches and the exported cutting outline.

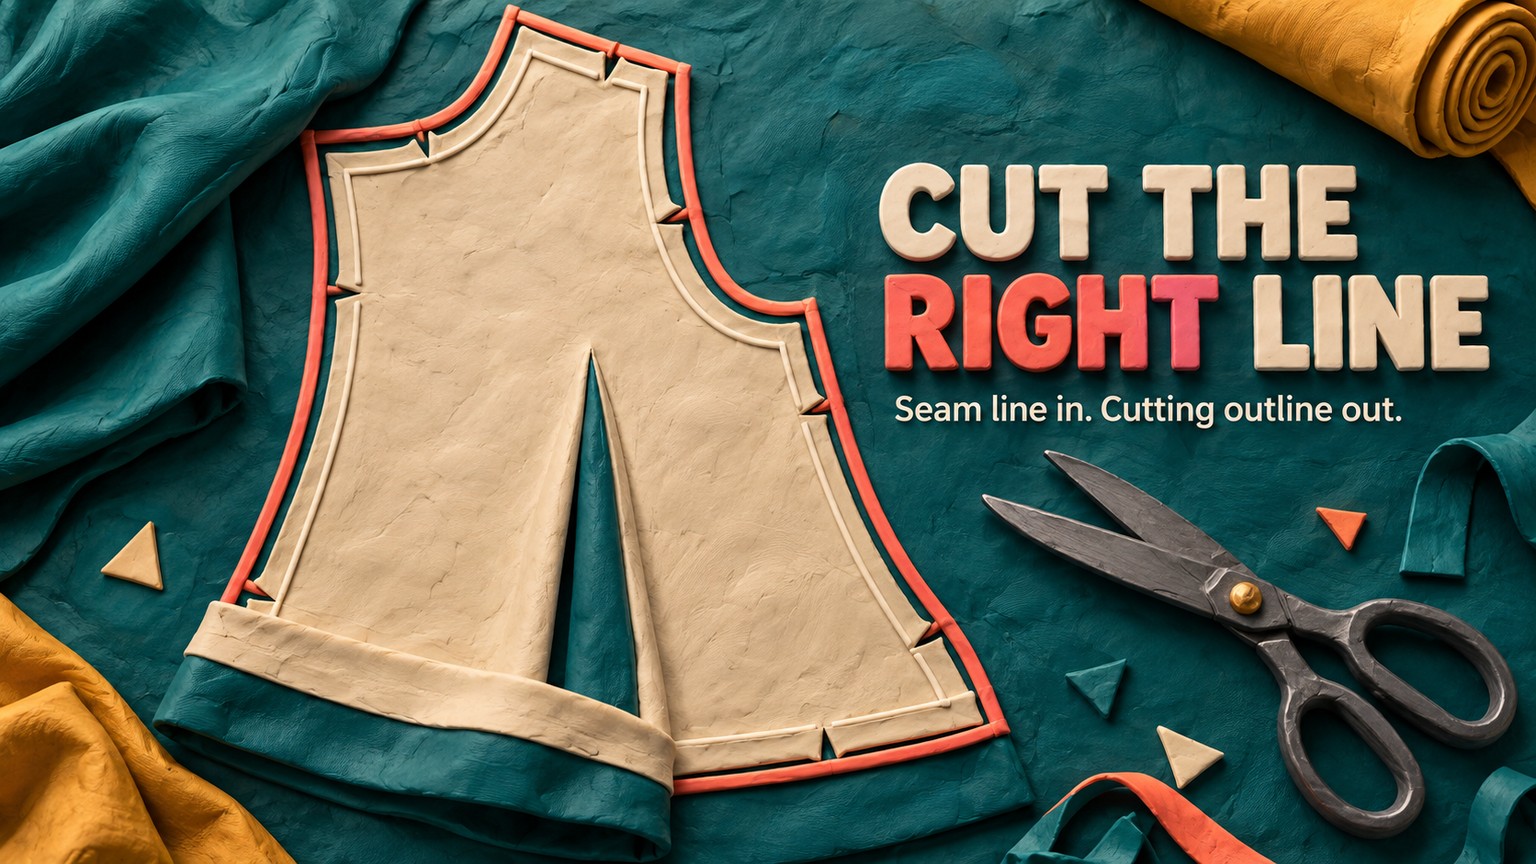
Add the allowance to the seam line once, then let Valentina maintain the cutting outline when the piece changes. The reliable method is to set one default width, override the two node sides that bound any special edge, mark the fold, inspect the corners and notches, and export at 100% scale.
The expensive mistake is not drawing one parallel line. It is cutting from the wrong line, forgetting that a fold needs no extra width, or manually rebuilding the outline after a measurement changes. Valentina keeps the drafted seam line and the derived cutting line connected, which makes the check repeatable instead of dependent on memory.
At publication, Valentina's download page lists 1.0.5 as stable and 1.1.1 as edge. This walkthrough uses the controls shared by both. The one visible difference is True zero width, which exists in the 1.1 branch. The worked piece uses a 1 cm default allowance, 0 cm on the fold edge, and 3 cm at the hem. Those are teaching values, not a universal sewing standard.
The short answer
To add seam allowance in Valentina:
- Finish the piece's seam line in Draw mode, including every point you will need for a fold, hem, corner, or notch.
- Open Details mode, choose
Workpiece tool, select the outline objects clockwise, and press Enter. - Open the finished piece's options. In
Paths, turn onSeam allowance, leaveBuilt inoff, and enter the defaultWidth. - Under
Nodes, choose the start node of a special edge and changeAfter. Choose its end node and changeBeforeto the same value. - Use 0 for a cut-on-fold edge and the required larger value for a hem. In 1.1.x, enable
True zero widthonly when the fold edge must be mathematically zero. - Add the fold label, define notches from main-path point nodes, inspect every corner, then export with horizontal and vertical scale both set to 100%.
That node rule is the whole trick: for a clockwise path, After controls the edge leaving a node and Before controls the edge arriving at a node.
What Valentina is actually drawing
The main path is your seam line. The automatic seam allowance is a second path offset from it, which becomes the cutting outline. Think of the seam line as a road and the cutting line as the curb: change the road, and Valentina can move the curb with it.
This distinction matters in the Workpiece dialog:
Seam allowanceturns the calculated outline on.Built inmeans the main path already includes the allowance. Leave it off when your drafted path is the seam line.Widthsets the normal allowance for the whole piece.Node,Before, andAfterreplace that normal width only around selected points.Anglecontrols how the allowance joins at a node. Start with the default and change it only when inspection shows that the join needs different treatment.
Keep Hide main path off while checking the piece. Seeing both contours makes it much harder to confuse the stitching line with the line you will cut.
Walk one piece from seam line to cutting outline
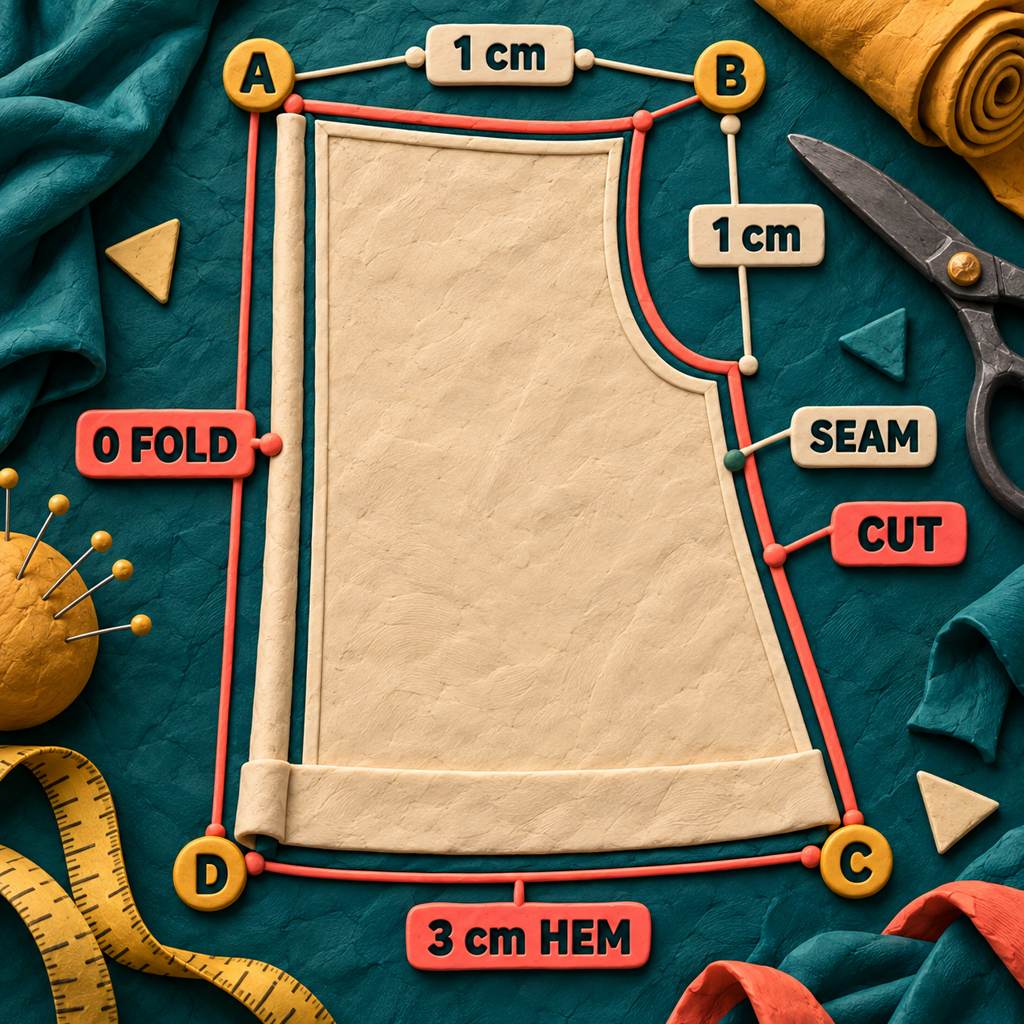
Use a simple four-node front panel so the mapping is visible. Select the outline clockwise as A at top left, B at top right, C at bottom right, and D at bottom left. The edges are then:
Notice what happens at D. Its Before field belongs to the hem arriving from C, while its After field belongs to the fold edge leaving toward A. A single point can therefore carry two different widths without a second outline or a workaround.
1. Prepare the seam line in Draw mode
Make the outline continuous and include actual points wherever an allowance will change or a notch will sit. Curves and arcs must meet their endpoint nodes cleanly. If an edge is visually touching but is not part of a valid continuous main path, the allowance can look broken later.
Do not draft the cutting line here. The point of this workflow is to keep one authoritative shape, the seam line, and derive the cut shape from it.
If you are opening an older file in the 1.1 branch, duplicate the original first. Valentina's 1.1 release notes say that 1.1 changes the file format and curve naming, and a file saved in 1.1.x cannot reopen in 1.0.x. Check formulas and curve references after conversion before editing the piece.
2. Create the workpiece clockwise
Switch to Details, choose Workpiece tool, and click the outline objects in clockwise order. Include the point nodes between lines and curves, not just the segments. Press Enter to open the Workpiece dialog, give the piece a clear name, and save it.
Clockwise order is not cosmetic. It gives Before and After a predictable meaning as you move around the path. If the outside allowance turns inward or node overrides appear on the wrong edges, path direction is one of the first things to check.
3. Set the default allowance
Open the piece options and stay in Paths.
- Check
Seam allowance. - Leave
Built inunchecked. - Enter
1 cminWidthfor this example. - Apply the change and confirm that a second outline appears outside the seam line.
Most edges should inherit the default. That keeps the piece easy to audit: only exceptions need node-level values, and the Default buttons can return an override to CurrentSeamAllowance later.
4. Remove the allowance from the fold edge
The fold runs from D to A, so set the outgoing side of D and the incoming side of A:
- In
Nodes, chooseDand setAfterto0. - Choose
Aand setBeforeto0. - Leave
D BeforeandA Afteralone because those belong to the hem and top seam.
On Valentina 1.0.5 stable, zero is geometry-safe rather than mathematically exact. Valentina keeps a tiny minimum of about 0.23 mm, which is normally invisible. Valentina 1.1.x adds True zero width; enable it if this edge must coincide exactly with the seam line. That option also disables intersection checks that assume a non-zero allowance, so use it for a genuine zero edge rather than as a general setting.
Now open the Fold line tab. Choose the fold-line type you need and set a short label such as CUT ON FOLD. The tab also exposes manual height, width, and center controls when the default mark does not fit the piece.
5. Give the hem a different allowance
The hem runs from C to D, so apply the same two-ended rule:
- Choose
Cand setAfterto3 cm. - Choose
Dand setBeforeto3 cm.
The cutting line should now step smoothly from the 1 cm side seam into the 3 cm hem, then meet the zero-width fold at D. Do not change only one end of the hem. That asks Valentina to transition across the edge and can create a taper when you intended a constant hem depth.
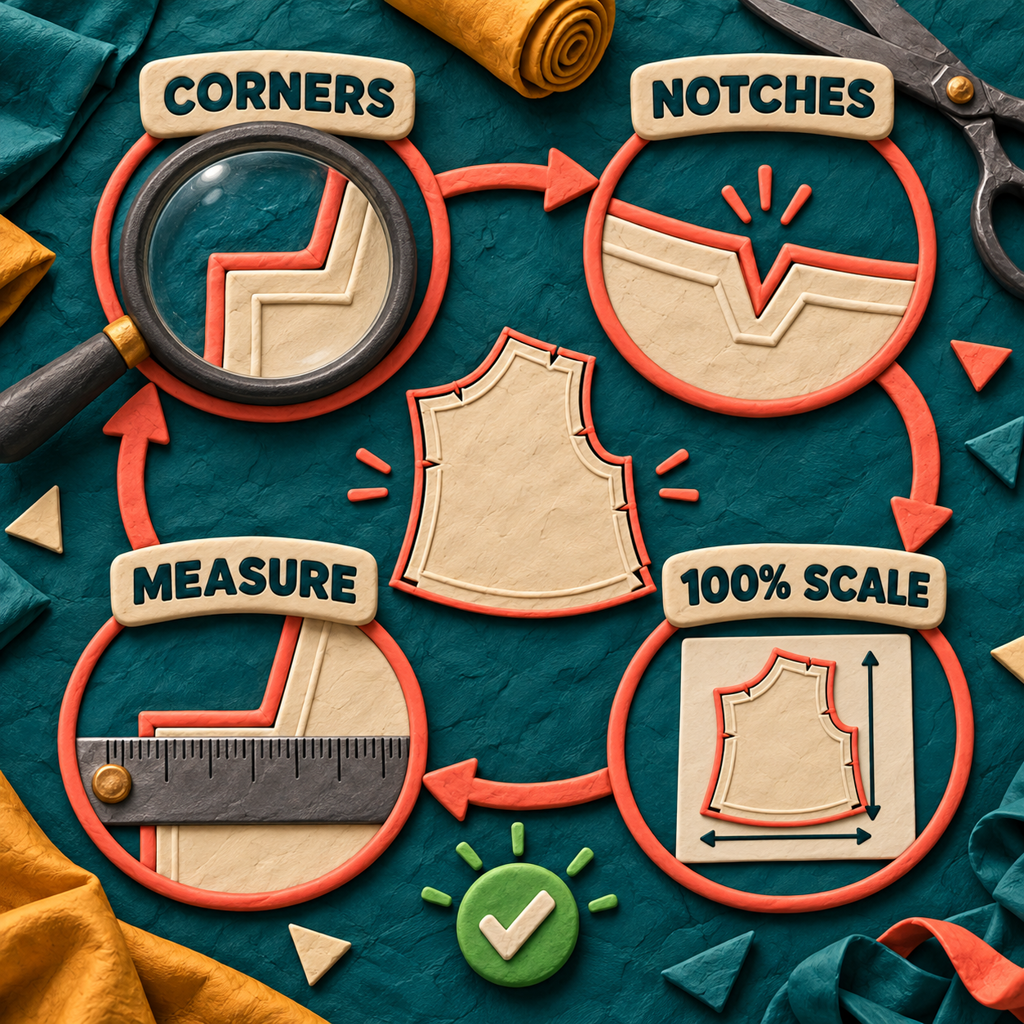
6. Inspect the corners before adding notches
Zoom into A, C, and D with both seam and cutting lines visible.
- At
A, confirm that the zero fold meets the default top allowance cleanly. - At
C, confirm that the default side allowance opens into the wider hem without crossing the seam line. - At
D, confirm that the wider hem closes into the fold without a spike or loop.
Leave the node Angle setting at its default when the join is clean. If it is not clean, first confirm the main-path order, the curve endpoints, and the two adjacent width values. A corner option cannot repair disconnected geometry.
The current 1.1.1 maintenance release fixed cases involving a garbled self-intersecting allowance and a stray spike from one symmetry corner mode. If an older 1.1 build produces either shape on valid geometry, update within the 1.1 branch before rebuilding the piece.
7. Add and check notches
Notches in Valentina are attached to point nodes on the main path.
- Return to the
Main pathlist in the Workpiece dialog. - Right-click the point that needs a match mark and choose
Notch. - Open
Passmarksand select that point. - Choose the mark type and inspect how it crosses or meets the cutting outline.
The current Passmarks tab includes line marks, T marks, V marks, U marks, box marks, and check marks, with optional length, width, angle, visibility, and Not Mirrored controls. Use the simplest mark that communicates the assembly match. More notch styles do not make the piece safer if their meaning is not documented.
For a fold edge, confirm that a notch was not mirrored when only one mark is intended. For a wider hem, check that the notch reaches the relevant boundary and is not lost inside the added depth.
The cutting-outline check that catches most failures
Run this check before layout, export, or fabric:
- Trace the seam line once. It must be continuous and represent where the garment will be stitched.
- Trace the cutting line once. It must remain outside the piece except where the fold intentionally collapses to zero.
- Name every exception. On this piece they are only
0 foldand3 cm hem; every other edge should still inherit1 cm. - Inspect transitions. Look for spikes, loops, self-intersections, and unexpected tapers at the four nodes.
- Check notches last. Their position should make sense against both the seam and cutting lines.
Export at actual size, then prove it
You can send pieces through Layout or use the Details-mode action labeled Export details skiping the Layout stage. The direct route is useful when another application will arrange the pieces. The Layout route is useful when Valentina should nest them on sheets.
Whichever route you choose, check the Save Layout or export settings before committing the file:
- Set horizontal scale to
100%. - Set vertical scale to
100%. - Decide whether
Boundary together with notchesmatches the output your cutter or downstream application expects. - Do not use a viewer's
Fit,Shrink, orScale to pageprint option.
Then print one page or open the exported vector in a measurement-aware application and measure a known dimension. The software setting and the physical check are separate gates. A file can be exported at 100% and still be printed smaller by a PDF viewer.
If the next step is projection rather than paper, the existing Inkscape projector workflow begins after the PDF exists. Finish and verify the Valentina cutting outline first, then hand that checked file to the projection workflow.
Six situations where this method pays off
These are ranked by who gets the most repeat value from keeping seam and cutting lines connected.
1. Independent PDF pattern sellers
A seller maintaining several sizes could keep one parametric seam line, a default allowance, and named exceptions such as folds and hems. When measurements alter the piece, the calculated cutting line follows. The payoff is fewer manually maintained outlines and a clearer pre-release QA pass.
2. Custom dressmakers
A dressmaker adjusting a block for each client could change measurements and formulas without redrawing every allowance. Fold edges, facings, and hem depths remain explicit exceptions. The payoff is consistency between the fitting line and the final cut piece.
3. Small-batch apparel studios
A studio could encode its normal allowance as the default and reserve node overrides for construction-specific edges. Reviewers then need to inspect the exceptions instead of comparing every edge by eye. The payoff is a repeatable handoff from patternmaker to sample room.
4. Bag and gear designers
A bag maker often mixes ordinary seams, zipper joins, binding edges, folds, and turn-under hems on one piece. Before/After controls let those widths meet at a shared node. The payoff is one piece that documents the construction logic instead of several manually offset variants.
5. Projector-sewing pattern creators
A creator preparing projector files could keep the seam line visible for assembly reference while exporting a verified cutting line, with a true or practical zero on fold edges. The payoff is a cleaner source file before contrast, layer, and projection adjustments begin.
6. Sewing instructors
An instructor could use one piece to show the difference between where fabric is stitched and where it is cut. A fold, wider hem, and notch make the relationship visible. The payoff is a concrete diagnostic exercise rather than a definition students have to memorize.
What you could build around this workflow
The best opportunity is not another general pattern editor. It is a focused Valentina onboarding and QA product for people who already want pattern-making software.
A Valentina starter and QA pack
Search demand is small but commercially clear: sewing pattern software gets about 720 US searches a month, and sewing pattern making software gets about 480. The smallest sellable version could contain a clean starter file, three worked pieces, a version-labeled Before/After cheat sheet, an export checklist, and short lessons that end in measurable files.
Valentina's project page identifies training and selling Valentina-made patterns as activities around the software. Current Basic binaries cost €8.26 monthly or €82.57 yearly, so a buyer can compare the education spend with a modest software budget rather than an enterprise CAD contract. The catch is maintenance: interface labels and branch differences must stay current, and generic videos are easy to copy.
A digital-pattern production service
Digital PDF sewing patterns gets about 170 US searches a month. A service could take a designer's approved seam-line block and return a production-ready Valentina file, checked allowances, notches, labels, and actual-size PDFs. The minimum offer is one garment with a written exception map and measured export proof.
The catch is responsibility. This service cannot decide construction order or a suitable allowance without the designer. It should translate an approved specification, not invent one.
A preflight checker for sewing-pattern PDFs
A small desktop utility could inspect page size, scale metadata, a control dimension, missing labels, and inconsistent page output before files reach customers. It would sit after Valentina rather than trying to replace it. The same 170-search digital-PDF audience supplies the first discovery channel.
The catch is that PDF geometry can be technically valid while the sewing logic is wrong. A preflight tool can catch scale and packaging failures, but a patternmaker still has to approve seams, hems, folds, and notches.
Limits and the honest take
Valentina can calculate the outline you specify; it cannot choose the correct allowance for a fabric, seam finish, production method, or pattern company. There is no universally good value. The construction plan has to come first.
It also cannot rescue a broken main path. If curves do not meet their intended point nodes, objects are selected out of order, or the outline self-intersects, changing corner settings only hides the real problem.
The 1.1 edge branch offers exact zero and newer fixes, but it is explicitly the faster-moving branch. The 1.0 stable branch remains the conservative choice. Preserve the original before crossing the file-format boundary, and move a team together because 1.1.x files do not reopen in 1.0.x.
For the current paid binaries, the practical entry price is €8.26 a month on Basic; the download page also keeps previous releases available free. The decision is simple: use the branch that matches your tolerance for change, and prove one exported piece before converting a whole library.
Frequently asked questions
How do I add seam allowance?
In Valentina, create the piece from its seam line with the Workpiece tool, open its options, turn on Seam allowance, leave Built in off, and enter the default Width. Use each special edge's starting-node After and ending-node Before fields for exceptions.
How much do I add for seam allowance?
Use the amount required by the pattern's construction method, fabric, and seam finish. Valentina accepts one default width plus edge-specific overrides, but it does not decide the sewing specification. The 1 cm, 0 cm, and 3 cm values here are only a worked example.
What are common seam allowance mistakes?
The common failures in this workflow are selecting the main path out of order, omitting point nodes, turning on Built in when the path is actually the seam line, changing only one end of a special edge, overlooking a corner spike, and printing with page fitting instead of 100% scale.
Do you have to add seam allowance to patterns?
Not if the pattern already includes it or the project is meant to be cut on the seam line. In Valentina, Built in describes a main path that already carries the allowance. Do not add an automatic allowance on top of an included one.
What's a good seam allowance?
There is no single good value for every edge. Choose a default that matches the construction specification, then set deliberate exceptions for folds, hems, bindings, facings, or other operations. Consistency and clear documentation matter more than one universal number.
Your Monday move: duplicate one real pattern file, finish one piece with this sequence, export it at 100%, and measure a known dimension. Repeat it across the pattern only after that first piece passes.
If you want a dependable pattern-production or preflight workflow built around your existing process, see the services available.
- Last Updated
- Sep 19, 2026
- Category
- Design
Prefer this site in Google


Mark omidsaffari.com as preferred and Google lifts it in Top Stories, AI Overviews and AI Mode for you.

Best Software for Overlay Mosaic Crochet Charts
Compare overlay mosaic crochet chart software by symbols, written rows, exports and the checks needed before you crochet.Sep 19, 2026Design
Stitchworks Crochet Charts Review
Review Stitchworks Crochet Charts for crochet symbols, rows, rounds and PDF or SVG export, including its archived status and current compatibility limits.Sep 19, 2026Design
EnvisioKnit Review
Review EnvisioKnit for knitting pattern design: chart editing, mirrored stitches, written instructions, export files and current computer support.Sep 19, 2026Design
Best Software for Leather Patterns
Compare leather pattern software for stitching holes, PDF tracing, cut files and accurate printing, including Leathercraft CAD 4.1.1.Sep 18, 2026Design
Fiberworks Bronze vs Silver
Choose Fiberworks Bronze or Silver by price, drafting features, shaft limits, and operating system. Keep Silver Plus loom control separate.Sep 18, 2026Design
Best Software for Diamond Painting Patterns
Compare diamond painting pattern software for photo cleanup, color counts, symbols and printing at the right size for your drills.Sep 18, 2026Design
WeaveIt Pro vs pixeLoom
Compare WeaveIt Pro and pixeLoom for prices, current Windows and Mac builds, WIF handoffs, trial limits and Dobby package costs.Sep 18, 2026Design